DNS Server
How to use goshs as a DNS server
goshs includes a lightweight DNS server that logs every incoming DNS query. This is useful in penetration testing and CTF scenarios where you want to detect out-of-band DNS interactions — for example when testing for SSRF, XXE, blind injection, or similar vulnerabilities.
To receive DNS callbacks from the internet you need a registered domain with an NS delegation record pointing to your server. See Domain setup for the full configuration.
Starting the DNS server
goshs -dnsThis starts a DNS listener on UDP port 8053 (default).
DNS server options
Collaboration options:
  -dns, --dns-server           Enable DNS server                   (default: false)
  -dns-port, --dns-port        DNS server port                     (default: 8053)
  -dns-ip, --dns-ip            DNS server Reply IP                 (default: 127.0.0.1)
Configuring the reply IP
By default the DNS server replies to every query with 127.0.0.1. You can change the reply IP to your actual listener address so that clients following the DNS response reach your goshs instance:
goshs -dns -dns-ip 10.10.14.1Changing the port
Standard DNS uses port 53 (privileged). Use -dns-port to bind to an unprivileged port instead:
goshs -dns -dns-port 53 -dns-ip 10.10.14.1Port 53 is a privileged port. Either run goshs as root or use the -u flag to drop privileges after binding.
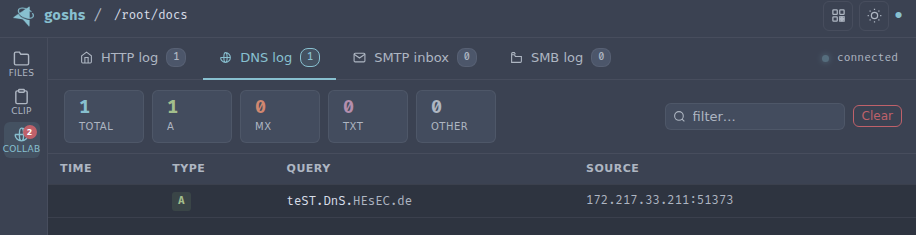
What gets logged
For every incoming DNS query goshs logs:
- Source IP and port
- Query type (A, AAAA, MX, TXT, etc.)
- Queried name
Webhook notifications
DNS query events can be forwarded to your webhook provider:
goshs -dns -W -Wu https://discord.com/api/webhooks/<id>/<secret> -We dnsUse -We dns to receive only DNS events, or -We all to include them alongside all other event types.
Running alongside the HTTP server
The DNS server runs independently and can be combined with any other goshs feature:
goshs -dns -dns-ip 10.10.14.1 -s -ss -b user:pass